Friday, February 17, 2023

A Dinner Party Showstopper

মুরগি মুসাল্লাম
Murgi Musallam


A labour of love


I've had this dish a few times growing up, always at dinner parties where it would be the centrepiece at the table. It isn't something my family cooked themselves, so until recently I didn't have a recipe I could pilfer from anyone to post on the blog. Since moving to the UK, I roast chicken in the oven often enough, but usually the recipes I use are British or fusion-y concoctions, and I've always wanted to add this traditional Bangladeshi recipe to my repertoire. Although as a quick side note, I'm sure this murgi mussallam isn't uniquely Bangladeshi. Versions of this dish are common across South Asia and the word mussallam itself - meaning whole - isn't a Bengali word.  

Lucky for me, I was having dinner with my best friend's family one day when her mom brought a whole chicken to the table, boasting that she had cooked this on the hob rather than in the oven. I was ecstatic, not only because the dish was delicious, but I finally had someone who could teach me how to make it! Long story short, she shared the recipe below with me, but also ended up giving my younger brother and I a few practical lessons in cooking the dish during subsequent visits. It's quite a long and laborious process, so I have to admit I don't make this often. However, it's too delicious not to share, and if you're happy putting in the extra effort for a special occasion, the results are worth it.


Ingredients:
  • A whole chicken, approximately 1.50 kg in weight
  • 20.00 g freshly minced garlic
  • 20.00 g freshly minced ginger
  • 1.00 teaspoon of powdered turmeric
  • 1.00 teaspoon powdered chilli
  • 6.00 tablespoons of plain yoghurt
  • 2.00 medium onions
  • 200.00 ml whole milk
  • 1.00 teaspoon of mace
  • Half a nutmeg, grated
  • A pinch of saffron
  • 1.00 tsp of black pepper
  • 2.00 cardamoms
  • 1.00 clove
  • 1.00 bay leaf

Method:
  • Mix the turmeric, chilli, garlic and ginger with 4.00 tablespoons of yoghurt. Spread over the chicken and leave to marinate for at least two hours in the fridge, or ideally overnight
  • Take the chicken out of the the first 15-20 minutes before cooking
  • Add a large amount of oil to a pot, ideally non-stick, big enough to hold the chicken with a lid on
  • Once the oil is hot, add the chicken, including the marinade
  • Brown the chicken, letting the bird sit undisturbed on each side for about 7-8 minutes
  • While chicken is browning, mince the onion - either by hand or in a food processor
  • Once, the chicken is browned, add the minced onion to the pot, directly into the oil rather than onto the chicken
  • Cook the chicken and onion on a medium-low heat for about 20-30 minutes, stirring the onion around occasionally so it doesn't burn
  • While the chicken and onion and cooking, put a small pot onto the stove on medium heat 
  • Once hot, add the nutmeg, mace and saffron and toast the spices for a couple of minutes before taking off the heat
  • After the 20-30 minutes have passed, add the tempered spices into pot, mixing into the paste
  • Add 50.00 ml of milk, again mixing in and flip the chicken. Turn the heat to low, cover and cook for 1.5 hours, adding milk every now and again and mixing it into the sauce when it begins to look dry
  • During the cooking, move the chicken around so it doesn't stick and burn, either with a large ladle, or by gently shaking the whole pot. 
  • Occasionally lift the lid on the pan and flip the chicken too so it doesn't only cook on one side, and spoon sauce over the whole thing before putting the lid back on
  • After 1.5 hours, grind the black pepper, cardamoms, clove and bay leaf using a mortar and pestle or spice grinder. 
  • Add this spice mixture to the chicken, along with the final 2.00 tablespoons of yoghurt. 
  • Cook for a final 20 minutes before taking off the stove. 
  • Serve while still hot with polao or your preferred carbs 

Additional Info:
There are as ever endless variations of this recipe. My friend's mom occasionally adds tomatoes to the sauce to give the dish a slightly tangy flavour, and stuffs the bird with a couple of boiled eggs before serving it with a garnish of salad. I know other recipes add nuts to the sauce as well for added richness, which I've tried before and it works quite nicely. However, this recipe is a lot of effort as it is so I've posted the simplest version I make! And if you want to make quite a bit easier, substitute the whole chicken for a chopped up one of about the same weight. 

Sunday, March 13, 2022

Review: Matir Ghor, Purbachal

Great traditional food just outside Dhaka  


Our table at Matir Ghor  


I feel lucky to have visited Dhaka at the end of 2019, just before the global pandemic kicked in. I've counted my blessing more than once over the last couple of years, especially as so many people haven't been able to see loved ones and family for much longer than me. My last visit home was unusually short, in between two busy periods at work, so it meant I actually stayed in Dhaka for once rather than travelling out to other places in the country. 

Of course, this wasn't something my parents could bear, so they had to take me out of the city for one road trip at least. Except, we didn't really head that far out of the city - only going partway to a planned new town project to the north-east of Dhaka called Purbachal. Apparently there was a really good fresh produce bazaar by the road on the outskirts of the town they wanted to shop from, as well as a nice traditional restaurant called Matir Ghor they thought I would like. And they were right, because Matir Ghor served up some really delicious traditionally Bangladeshi food. The restaurant is over an hour away from Dhaka, depending on where you're travelling from and what traffic is like on the day. As I was on holiday and my parents are retired (aka permanently on holiday - not as great as it sounds, they're usually bored), we went outside of rush hour on a weekday, making for quite a swift trip to a fairly empty restaurant. 

The restaurant building, just to the left

The venue is on a side street just as you turn off from the main road. There wasn't a gate or sign when I visited, just a bright-red clay path winding away from the street into the trees. Follow the path down, and you'll realise you're in the right place when you get to a bit of a clearing with parked cars. The site is a collection of single storey buildings set amidst a nicely overgrown garden. Talking to the staff, we learned that this was the owners' grandparents' home. Apparently the family aren't in residence anymore, but they wanted to preserve the site by turning it into a traditional restaurant. The main restaurant building is indeed made from earth as the name suggests, complete with a tin roof and bamboo supports. The structure has some supporting brickwork, along bright red metal doors and windows.

Clay walls, wooden benches and art on sale 

The look continues on the inside, with lanterns hanging form the ceiling, wooden furniture and earthen tableware - everything from the serving dishes to plates and glasses. But the little fans give away that the place does have electricity, despite the lanterns on the ceilings. And despite the old-fashioned look, this is a slick operation - with attentive staff, written menus and art for sale on the walls. A lot of the food is out on display in quirky serving dishes at the end of the room, and I would recommend wandering up to a have a look before ordering. 

Clockwise from the bottom left: tomato, lau, shutki, haash and murgi


The whole family loves eating, and so we ordered generously. From the vegetables we had tomato bhorta, lau pata or gourd leaf bhorta and paachmishali or 5-grain mixed daal. From the meat and fish options we had chicken cooked in bamboo, duck bhuna, king prawns with aubergine and shutki or dried fish bhuna. All of the food was delicious and clearly expertly cooked - and refreshingly a far-cry from the overly oily and spicy food served at a lot of Dhaka eateries serve. The ingredients tasted fresh too, and it really did feel like I was having a meal made from ingredients just brought in from the farm a few hours ago. I particularly liked the veggie dishes, as there's nowhere to hide when you're working with delicate flavours. The shutki was also very welcome, as I hadn't had it in quite a while. The bamboo-cooked chicken made it clear the place was potentially serving Chakma food and that the chef was possibly Chakma. And indeed, the spicing in some of food was slightly different to what I'm used to, but I don't know enough about Chakma cuisine to be able to describe exactly what was different. We rounded off the meal with some doi and payesh for dessert, but the former was bought-in and the latter was made with plain sugar - so I wasn't a big fan. However - dessert is not why anyone's coming here! 

This is a meal best shared with others, as all the portions are one and a half person's worth of food in my opinion. It's worth noting that this place is an actual restaurant catering to clientele on a day out from Dhaka - rather an a casual roadside eatery - and the prices reflect this. You pay similar to what you could expect from similar places in Dhaka back in 2019, with vegetable dishes around the TK 50 mark, whereas meat and fish dishes cost TK 200 upwards.  

Matir Ghor can be a bit tricky to find as it doesn't have a very specific address. I've noted down the restaurant's contact information as usual at the bottom of the review, but for convenience the Google maps location is hereI've decided to stop scoring reviews, and given I visited Matir Ghor a good while ago I'm not sure I could justify scoring it anyway. However, I can certainly say I'm looking forward to visiting next time I'm in Dhaka! 

A: Ketun, Dhaka Bypass Road, Kalihonj, Gazipur
T: +8801716883120
W: None

Thursday, January 13, 2022

A Dessert That Kept Me Alive

ডিমের জর্দা
Dimer Jorda


Dimer jorda, or halua


This is basically how I liked my eggs done as a child. Not that my family would let me have this regularly - with good reason - just look at how much sugar the recipe calls for! But deemer jorda (or deemer halua to some) is very easy to cook, and my mom or aunts would often rustle some up when they needed a quick, fuss-free dessert. During my university years, the cheap and common ingredients meant it often featured in my diet. A healthier home cooked substitute to store bought desserts, or so I told myself.

Nowadays I'm a little more restrained, and I see dimer jorda as an occasional indulgence. The easiness of the dish makes it a great go-to for when I've just cooked a large meal for guests, and need a little less stress with dessert. During our various lockdowns, I found myself eating it on occasion to give myself a reason to live break up the monotony of store bought treats - though before the pandemic I never would have imagined tiring of chocolate and ice cream.

The dish is meant to look a little like yellow rice - and so it's important to watch the egg cook and break it up at the right time. Do this wrong and you end up with a pan full of sweet scrambled eggs. And of course, while I've talked about dimer jorda as dessert, it's often also served as a tea-time snack. The recipe below serves 4. 


Ingredients:
  • 4.00 eggs
  • 125.00 g white sugar
  • 125.00 ml evaporated milk or 250.00 ml whole milk
  • 2.00 tablespoons of butter or ghee
  • 1.00 "capful" vanilla essence, or to taste
  • 2.00 cardamom pods
  • 1.00 "capful" kewra water, or to taste, optional
  • 2.00 cm of cinnamon, optional


Method:
  • Leave the butter or ghee to soften at room temperature
  • If using whole milk, begin by reducing this to half in a non-stick saucepan on medium heat. Stir frequently to ensure it doesn't stick or burn. Once done, leave to cool
  • Beat the eggs and sugar lightly with a fork until mixed, making sure there are no remaining clumps of egg white
  • Follow up by pouring in the cooled reduced whole milk or evaporated milk, and again mix to incorporate
  • Put a frying pan on medium low heat, adding the butter or ghee. Once warm, add the cardamom and (if using) cinnamon - then continue frying for a couple of minutes  
  • Transfer egg, sugar and milk mixture to the frying pan
  • Mix everything together, and let cook on low heat, stirring continuously
  • Add the vanilla (and kewra water, if using) at the 5 minute mark, and continue cooking
  • After 10 minutes the mixture should start solidify into loose, slimy clumps - break these up by stirring, and ensuring the clumps look like approximations of rice grains
  • Cook until all of the jorda clumps into something that looks like mushy rice - this can take up to another 20-30 minutes
  • Cooking times will vary based on the size of the saucepan - a larger, wider dish will let the jorda cook faster
  • Once done, transfer out of the saucepan immediately to halt the cooking process
  • Serve as a snack during tea or as a dessert, garnish with raisins and crushed pistachios


Additional Info
Dim (or should it be deem??) is the Bengali word for egg, and there are countless variations of this recipe, often called dimer "halua" rather than "jorda", based on national and regional variations. People have numerous methods of manipulating the texture, from the use of breadcrumbs to the addition of powdered milk, or adding food colouring to make the dish pop. I've kept this recipe very simple, but do look around for other versions to find what you personally prefer.


Wednesday, December 30, 2020

Cooking During the Pandemic

ফুলকপি ডাল  
Cauliflower Daal 


Cauliflower daal with brown rice


What a year its been. Apart from that, I don't think I have much to say. 

Like many of us, I've spent a lot of the year inside - food shopping in bulk to avoid being in busy public places for too long. That's meant a lot of cooking at home, and while for me that's been an unexpected blessing, most of what I've cooked has been the usual curries, stir-fries and simple pasta dishes. 

And despite the pandemic, work has been as busy as ever. Only now at the end of the year am I taking a bit of a break, and this is my chance to share a quick recipe. In the last few months I've gotten better at cooking Bangladeshi and South Asian vegetarian food - making different types of daals and experimenting with spiced shobji bhajis and Bangla-Chinese stir-fries. This is mainly because of the frozen veg I started buying when fresh produce ran out near me. The larger portions frozen veg comes in meant learning to cook bigger veggie dishes rather than just side dishes. 

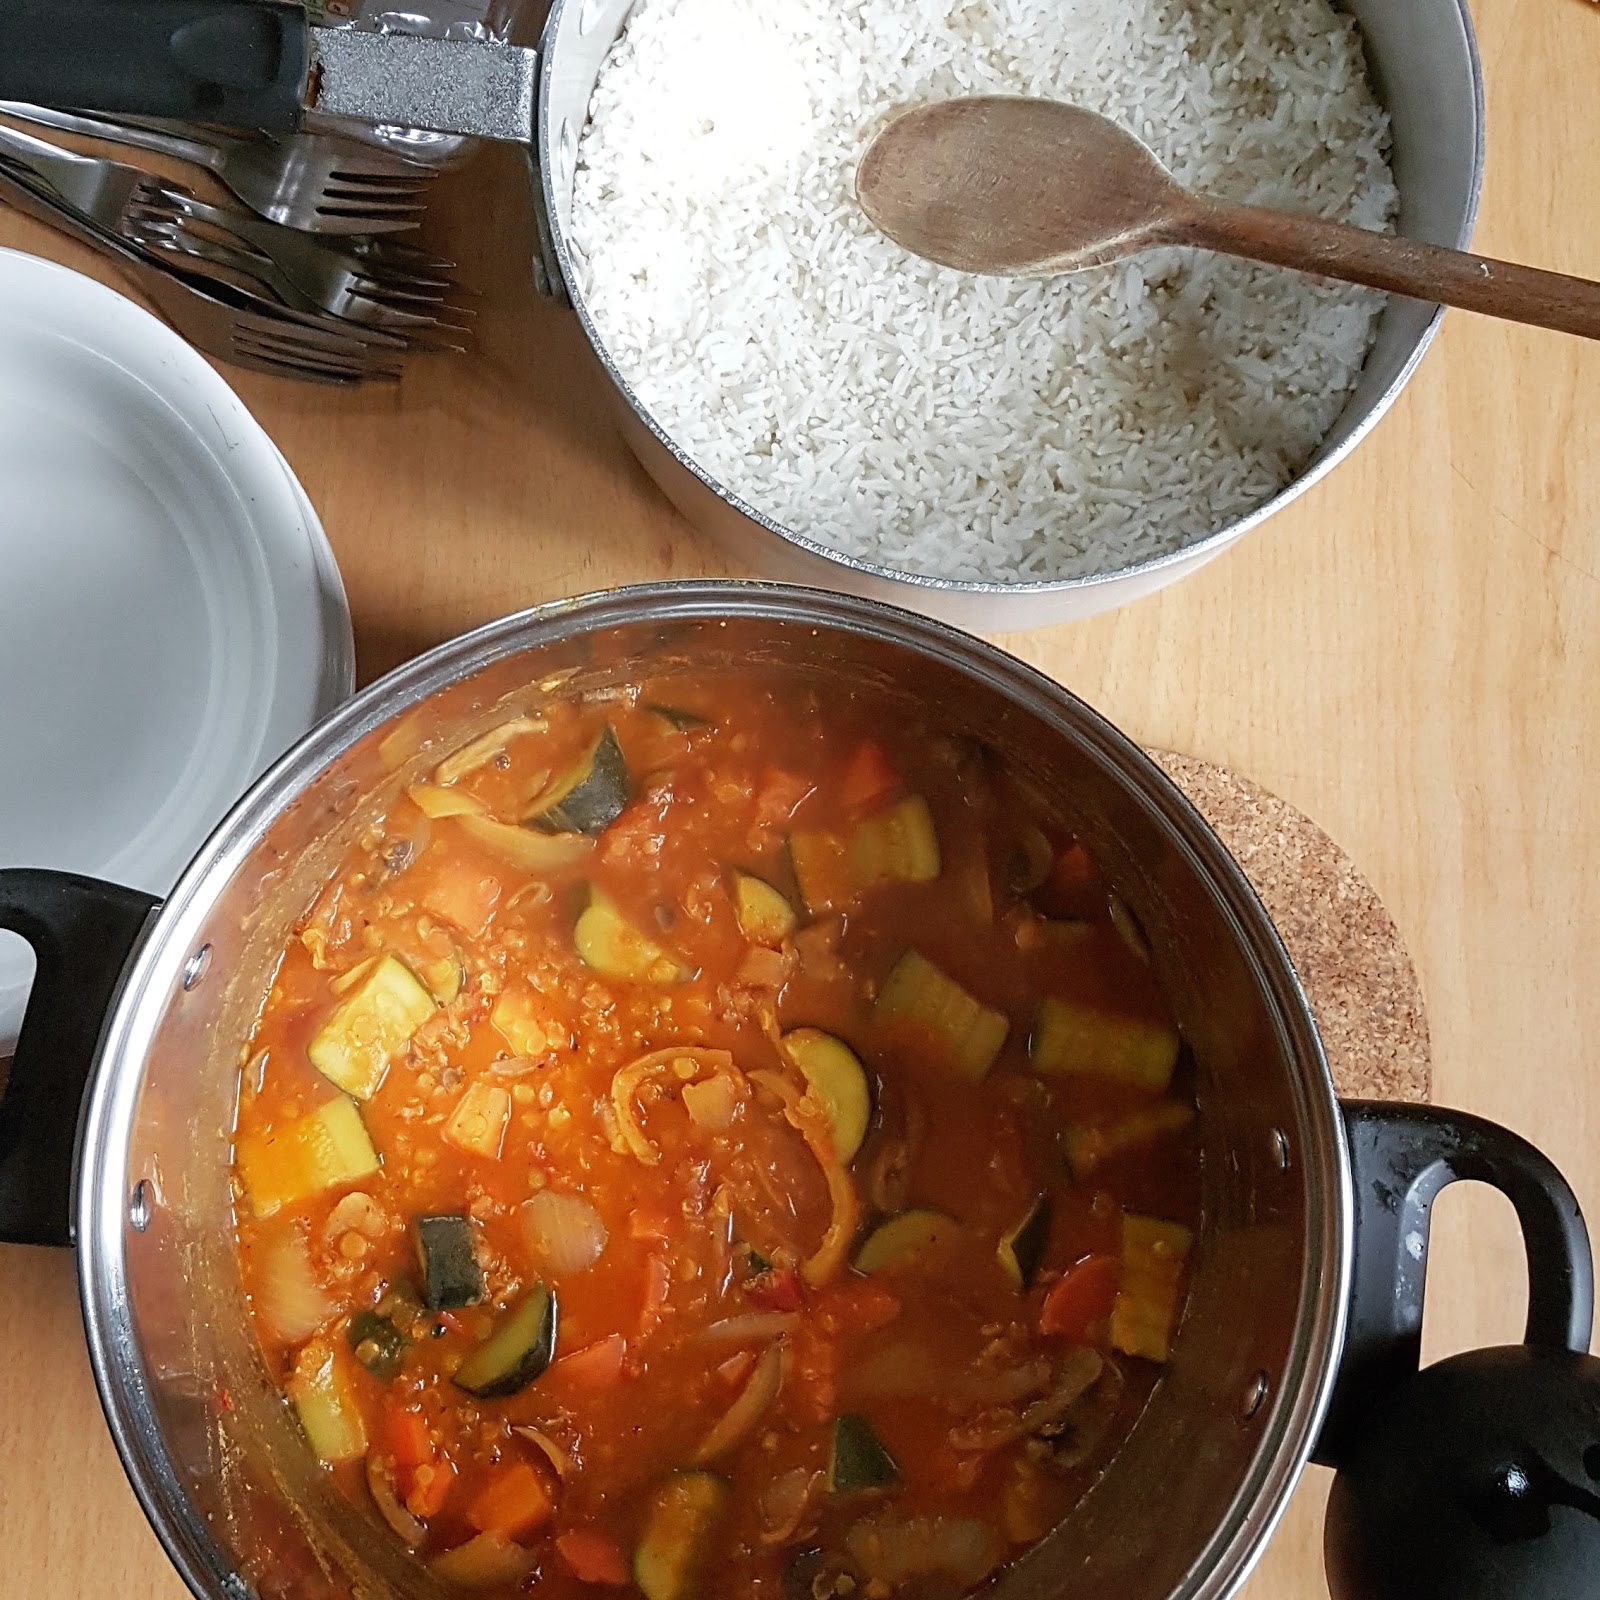
This slightly spiced vegetable daal is a result of that - nothing too glamorous and indeed quite similar to another daal recipe I shared a while back. I originally cooked it using frozen cauli, but I've reduced the cooking time assuming fresh cauli in the instructions below. I also like the veg in my daals to be quite mushy, so do reduce the cooking time further if you want more crunch. The recipe below makes enough for 6 portions as a side, or perhaps 4 as a main. It's great comfort food if you like daal, and in normal circumstances I would serve this with rice and another protein course. 


Ingredients:
  • 140.00 g or mushur daal (red split lentils)
  • 1.00 teaspoon of garlic paste
  • 1.00 teaspoon of ginger paste
  • 0.50 teaspoons of turmeric
  • 0.50 teaspoons of powdered chilli
  • 0.50 teaspoons of powdered coriander seed
  • 0.50 teaspoons of powdered cumin seed
  • 1.00 teaspoon of whole cumin seeds
  • 2.00 tablespoons of cooking oil, any type
  • Half a head of fresh cauliflower
  • 60.00 g of frozen peas
  • 2.00 cloves of garlic
  • 2.00 fresh green chillies
  • 2.00 tablespoons of mustard oil
  • Salt, to taste

Method:
  • Place the daal in a large bowl and fill with water. Wash it thoroughly, draining away the water and repeating the washing process until the water runs mostly clear
  • Leave to soak for a few hours - this will help the daal cook quicker later
  • Place a deep saucepan on the hob over medium heat, and add the cooking oil
  • Once the oil has heated add the garlic and ginger pastes, along with the dry spices
  • Mix thoroughly, and allow to cook for a couple of minutes
  • Drain the daal and add it to the pan. Mix the spices and daal together, and allow to cook for 2-3 minutes
  • While the daal and spices are cooking, boil a litre of water in an electric kettle. Pour the water into the pan, giving the daal a good stir. Partially cover the pan and leave to cook for 25-30 minutes, lowering the heat slightly
  • After 30 minutes have passed, chop the cauliflower into smaller bite size pieces and add to the daal. Partially cover the pan again, and leave to cook for 10-15 minutes
  • After the cauliflower and daal have cooked together for at least 10 minutes, put a small frying pan on medium-low heat and add the mustard oil
  • As the oil heats up, chop and add the garlic cloves. Once they've begun sizzling add the fresh chillies and cumin seeds, continuing to fry for about a minute, before taking the frying pan off the heat
  • Check on the daal, stirring lightly to check if the cauliflower is cooked and tender and the daal has broken down into a creamy base. At this point, top up with some more freshly boiled water depending on the consistency of daal desired
  • Add the mustard oil, garlic, chilli and cumin seeds from the frying pan to the daal - followed by the peas
  • Leave to cook partially covered for a final 10 minutes, before taking off the heat
  • Serve hot with rice, as a main for a simple meal or as a side as part of multiple courses 

Saturday, February 9, 2019

A Lighter Fish Stew

পাঙ্গাস মাছের দোপিঁয়াজা 
Basa Dopiaza with Peas & Tomatoes


Pangash in a broth of onion, peas and tomatoes


My only New Year's resolution for 2019 is to cook more fish, and so I'm pleased that my first recipe this year is a Bangladeshi fish stew. I've been wanting to share a recipe like this for a while, but I just wasn't sure what fish to use from the supermarkets around me in the UK. However, it seems they've started stocking basa nowadays, which I grew up eating and know as pangash in Bengali. Native to South Asia, pangash has gently flavoured white flesh - which works well with the lighter spicing of this recipe. 

The classic Dhaka "hotel" version of this dish is made with spices and onions only, in keeping with what a dopiaza usually is. But mom used to add tomatoes and peas at home to give the dish a little more flavour, which is especially important if the fish you're using isn't fresh. Traditional cuts of fish in Bangladesh leave bones in, which means the fish survives* the vigorous cooking process more easily. In the UK I can only get fillets**, which are a little delicate and prone to breaking up from frying and stewing. I recommend cooking this in a pot large enough to hold all of your fish in a single layer, so that the pieces aren't rubbing against each other as you try to flip them or stir the sauce. Additionally, you could opt to flash fry the fillets rather than frying them for 4-5 minutes as I recommend. This makes it easier to keep them intact. However, do note that it's typical in Bangladesh to fry the fish in hot oil long enough so that the pieces are left with a crust - and flash frying won't quite give you the same texture or flavour.

The recipe below serves two generously, or four as part of a bigger meal. Please note that unlike most of my meat recipes, this stew will not keep in the fridge for more than a few days. 

Wednesday, January 2, 2019

Places to Eat in Bali


Bangladeshis - if you thought we had lots of rice fields, just wait till you see Bali

**************************

Before you read further, please consider donating to the Red Cross Indonesia Earthquake and Tsunami Appeal. The Red Cross is supporting rehabilitation efforts from the tsunami that struck the country in December 2018.


**************************

I spent a large part of my childhood in Asia, living between Bangladesh, Hong Kong, Thailand and even briefly the Philippines. This time was perfect for seeing much of the continent, but somehow I never made it to Indonesia till late last year. For someone who spends his life meticulously planning every meal, it was a somewhat impromptu trip - aided by the fact that Bangladeshis no longer need visa to visit the country as a tourist. I think this is a relatively recent rule change, and I took full advantage of it while booking last minute flights and hotels. 

I had around 9 days in the country, courtesy of a break in between jobs and a relocation from Scotland to England. My friends and I kept the itinerary simple, visiting 3 different parts of Bali - Ubud, Sidemen and Nusa Dua. Bali felt like the perfect holiday destination for me, as the it had a whole range of things to do within driving distance: from mountains and jungles to beaches and watersports. But I digress - this is a food blog rather than a travel blog! And hence the below is a very short food guide, focussing mostly on Ubud and with a single entry in Sidemen. I will unashamedly admit to confining us to a luxury resort while in Nusa Dua. Unusually for me, I've also listed a couple of places I wouldn't necessarily recommend going - more as a cautionary tale as they're quite well known. 

The food in general around Bali was quite good, and you can't go far wrong if you're amenable to south and southeast Asian flavours. I found myself making regional comparisons a lot - the fried rice was served a little differently to Thailand, with many small portions of food surrounding a central mound of carbohydrates. More interestingly, so many of the curries reminded me of Bangladeshi dishes, with slight accents of lemongrass or peanut. But as ever on holiday posts, I can claim no expertise on the food - and the below is simply a list of places I recommend going (or not!). 


Wednesday, December 19, 2018

Roast Stuffing "Innovations"

Lamb & Apricot Kofta


Our Christmas spread last year: roast, veg, gravy,
biriyani, mac & cheese among others.
Hasty, blurry photos were taken,
but you can still see I burned some of the kofta! 


Since moving to the UK, I've made it my mission to consume as many Christmas-style meals as possible during the month of December. I love cooking roasts and its accompaniments because I don't usually get to, and of course I love any kind of meal that brings people together. Last year I spent the holidays with friends, and we made a joint meal where I volunteered to do the roast and stuffing. The roast was a very simple affair - think normal Bangladeshi spicing on a chicken, marinaded overnight before going into the oven. The stuffing, however, was a little different - because basically it was this. 

I think stuffing is traditionally made from breadcrumbs pimped up with herbs, spices and (usually) pork sausage. Most of us at the meal last year didn't eat pork, so I initially considered replacing it with another fatty minced meat. This line of thought eventually led me to kofta - and finally I decided I'd just make lamb kofta with some breadcrumbs and pass it off as stuffing. I added the apricots as I've been served stuffing with apricot before in British households, and I really enjoy the lamb and apricot combo. Once I'd decided on the apricot, I thought why not also use up the jar of Moroccan spices languishing in my cupboard, hence the ras el hanout. If you don't have ras el hanout at home just swap for powdered cumin and coriander seed.

These koftas can be deep-fried or roasted in the oven - do whatever suits your routine.  Roasting makes them a bit drier, unless you do of course stuff them inside a roasting bird. I've given pan-frying instructions below to keep things simple. The breadcrumbs in the recipe below are definitely optional. As you'd expect, they give the koftas a heavier, drier feel. Without them, expect something meatier and bouncier. If you look at my recipe for beef kabab, you'll notice a lot similarities in both method and ingredients. Both dishes have the same roots, but the bread and beef creates a pate-like texture with bite, while the fatty lamb gives you a more squidgy, elastic end-result. The recipe below makes enough koftas to serve 4.

Ingredients:
  • 500.00 g of lamb mince
  • 1.00 large onion
  • 1.00 tablespoon of garlic paste
  • 1.00 tablespoon of ginger paste
  • 75.00 g dried apricot
  • 2.00 tablespoons of supermarket ras el hanout (alternatively, use 1.00 tablespoon each of powdered cumin and coriander seed)
  • Fresh parsley, a small handful
  • Fresh coriander, a large handful
  • Fresh mint, a small handful
  • Breadcrumbs (optional), a small handful 

Method:
  • Grate the onion by hand or in a food processor
  • Thoroughly mix all of the ingredients together, making sure that the herbs and spices are distributed evenly within the meat
  • Form small sausage-like kofta shapes of the mixture, each about 4.00cm in length. Make sure they aren't too fat, or it will be difficult to get the middle to cook
  • Put a frying pan on medium heat. Pour in enough oil so that the liquid is deep enough to submerge about half a kofta
  • Once the oil is hot, add the koftas to the pan, being careful not to overcrowd the vessel. Unless the frying pan is massive, expect to cook the koftas in batches
  • Fry the koftas on medium heat for about 3-4 minutes, then flip them over and fry for another 3-4 minutes on the other side
  • When done, the koftas should be evenly browned. This can take practice - I've often cooked them too long and burned them black 
  • Also important - resist flipping them before 3-4 minutes have passed, as the meat won't have cooked and sealed, and the kofta could fall apart from the movement
  • Serve the koftas hot with flat breads like naan or pitta 

Additional Info
For easy variations, play around with the herbs and spices. And of course, omit the apricots if you don't like the sound of them! To cook these in the oven, pre-heat a fan oven to 200C, place on the middle shelf and cook for 25-30 minutes. 


Sunday, September 2, 2018

Family Food Fights

মুরগির কলিজা 

Curried Chicken Liver


Chicken liver and potato swimming in deliciously spicy jhol :) 


Organs and innards aren't everyone's cup of tea. While heart, lungs and offal are part of everyday Bangladeshi cooking, I know many people who pass on these options. Which is their loss, as far as I'm concerned. I was introduced to animal innards early in life, and I am a big proponent of cooking and consuming them. After all, as people who eat meat, we should make efficient use of the animals we (indirectly) kill. I eat everything from cow's intestines to chicken's feet and goat's lung, and in fact, intestines are a particular favourite in my family! 

The most common organs at my table, however, come from the humble chicken. While I was growing up, everything from the head and brain, to the heart, gizzard and other parts I have no English translations for, would be cooked into our everyday chicken dishes. And that would set off the fighting between siblings and cousins, as we tried to decide who would get to eat what. The head seemed to be most people's prime target, though for me, the prize was always the liver. And with no one else interested, I grew up stuffing my face with the liver from every chicken cooked at home. For me, chicken liver with its soft, fluffy texture is like an amazingly meaty, savoury cake. And I love it just as much as I love cake.  

Calamity struck when we moved abroad though, where supermarket chickens were sold without livers. The next few years of my life were spent devoid of chicken liver, except during the visits back home, or after the odd trip to particular butchers. However, it seems more and more supermarkets in Britain (where I currently live) stock liver as a standalone product. This has meant a return to cooking liver curry for me. The spicing I favour is similar to most other Bangladeshi curries, though the amounts of each spice is toned down in comparison. Chicken liver cooks easily, and doesn't need the super-charged treatment that cow or goat liver might warrant. The recipe below is for 400.00 g - the standard weight sold near me. This technically serves two generously as a main dish, but as liver is rather rich I'd recommend it as a side dish shared amongst a few more. 


Wednesday, August 1, 2018

Cooking on the Trail

সবজি ডাল  
Daal with Vegetables


Spiced daal with vegetables


I spent a weekend in Glen Affric earlier this summer, staying at an off-the-grid hostel while attempting to climb some local munros. The hostel itself was quite unique - 13 kilometres from the nearest road and powered solely by a wind turbine and solar panels. This is enough for lights and some heating, but not much else. Cooking is done on gas stoves - supplied by cylinders that are transported in using off-road vehicles. The remote location also makes it difficult to carry supplies onto site regularly, and guests are encouraged to bring food for their own trips. I was travelling with a group of friends, and we all pitched in to carry enough for 3 days. But this was 3 days without access to refrigeration, and we had to make sure everything we brought was non-perishable. 


Did I mention Glen Affric was beautiful?! 


I was in charge of dinner on day 2, and I had to think of ingredients that would cope well without a fridge. Hence I opted for daal with vegetables - but spiced up a little to make it work as a main event. I was a little worried about feeding a group of hungry hikers something like this, especially as at my family table daal would never be more than a side dish. So I decided this iteration needed to be richer, and I immediately knew I'd be using meat spices as a base. I've also always loved tart daals with jolpai and green mango - so I replicated that tartness here with tinned tomato. For the veg, I opted for carrots and courgettes because they were tough enough to survive the journey in our backpacks. The result was a spicy, tangy and thick daal: something I know I'll be cooking for years to come. The recipe below serves 6 generously. 

Monday, May 7, 2018

Vegan Bangladeshi

নিরামিষ

Mixed Vegetables


Mixed vegetables with panch phoron


Don't worry about the title, I've not gone vegan. I'm just finally confident enough about my veggie cooking skills to share this recipe. I'm not sure quite why it took me so long to get here, but vegetables don't come to me as naturally as meat. I find it more difficult to get the flavours right, and the cooking times correct. However, I am trying to eat more of them, while at the same time cutting down on meat for health and environmental reasons. Right now I'm helping this process along with a bright and interesting recipe for mixed vegetables with panch phoron, a staple of most Bangladeshi kitchens. Aside from simple turmeric-and-chilli stir fries and hearty mashes, this is how I'd expect vegetables to be eaten in a Bangladeshi household. In our family, vegetables cooked this way could be served for breakfast, lunch or even dinner - though hopefully never all on the same day!

Panch phoron is a five-spice mix consisting of cumin, fennel, fenugreek, black mustard and nigella seeds. If you're not in Bangladesh, don't fret. The mix is commonly stocked in many Asian corner stores and supermarkets around the world. Of course, you can always make up your own mixture, using each component in equal amounts. My most vivid memories of panch phoron are from its use in pickle-making, along with cooking vegetables like this. In my mind, panch phoron is to cooking what colour-blocking is to the fashion world. In most dishes I make, the spices come together and create a unique new flavour - like a colour-coordinated school uniform. It's not so with panch phoron, where instead it feels like the different flavours all compliment and bounce off each other. If you're not Bangladeshi, this spice mix may feel like an acquired taste. 

The recipe below is quite long, but only because I've broken it down into simple, easy-to-follow steps. I would advise not using store-bought garlic and ginger pastes here. The short cooking time won't rid them of their vinegar-y smell. You wouldn't normally encounter chickpeas in this dish, but the eateries near my late nani's all make their shingara fillings this way. Inspired by them, I've included chickpea in my recipe too. It adds some protein, and helps me turn this into a one-dish dinner for weeknights.

Finally, a few notes on the cooking times. These will vary depending on the vegetables used. Fresh, younger plants will cook faster than the older and tougher. Equally, there will be differing opinions on what constitutes "cooked". Some people prefer everything in this dish to go soft and mushy, while others prefer their vegetables to retain a slight crunch. In our family, we opt for the crunchier version of this dish, unless we're serving it for breakfast. For breakfast, we cook this for longer than stipulated below, and with more water. The end result would be soft dollops of vegetable and a tiny bit of broth - ideal for scooping up with ruti! Do experiment with timings and combinations that suit your own preferences. The recipe below serves 4 as part of a larger Bangladeshi meal. 

Saturday, February 17, 2018

Re-Inventing The Wheel

থাইম, মধু ও সৃরাচা দিয়ে মুরগি  

Chicken with Honey, Thyme & Sriracha


Serving challenges when you have no dining table! 


I discovered how well Sriracha and thyme compliment each other by accident. I was basting some chicken in thyme-butter one day, and the Sriracha was just sitting there on the counter...calling to me. I added some to the frying pan, purely because I always love a little heat in my food. I realised the combination was a success with my first mouthful, and made a mental note to try it again in the future. Fast forward to early 2018, and I started to make mom's chicken ketchup curry, only to realise there was no tomato ketchup at home. I quickly decided substitute in Sriracha, and as soon as I did I recalled my previous positive experience with thyme. 

I wondered how to incorporate the herb into my curry, eventually deciding to stir it in towards the end of the cooking process. The thyme didn't impart a pronounced enough flavour in this first try. In subsequent iterations, I've also scattered an extra portion into the pot before taking the dish off the heat. All in all, I end up using quite a bit of thyme because it's easily overpowered by the other spices. The herb gives the dish quite a nice after-kick of flavour, but I do recognise this is probably a rather esoteric, acquired taste. I don't think I'd be a fan had I not learned to love thyme while living in the UK. Of course, feel free to leave the thyme out completely if you so desire, and the end result will be a strong, garlicky version of my mom's original curry.  


Monday, January 29, 2018

Basic Bangladeshi Greens, Part 1 of n

Swiss Chard with Mustard & Fennel Seeds

সরষে ও মৌরি দিয়ে সুইস চার্ড 


Messy but delicious


I bought Swiss chard by mistake the other week. Embarrassingly, when I got home and unpacked my groceries, I didn't recognise the plant for what it was. I tentatively trimmed and washed some of it, then cooked it into mac & cheese. I was counting on the smoked cheese from my sauce to cover up any weird tastes or smells. It turned out the apprehension was unnecessary, as eventually someone on Instagram confirmed it was just chard! Chard I could work with, and I initially contemplated cooking the remaining plants just like spinach. Our family relies on the tried and tested garlic-and-chilli combo to cook most of our leafy vegetables, expect for maybe potato leaves and thankuni patha. 

But then I reconsidered, and began wondering how I could incorporate mustard into the dish. I've been a little obsessed with mustard since moving to Scotland, and I go through this thought process for pretty much everything I cook now. I decided ground mustard seeds would work quite nicely as a base flavour, with some fennel seeds as complement. I rounded off the ingredients list with a little turmeric for colouring, and some sliced onion to ease the frying process. The result was a win: think soft pieces of plant peppered with caramelised onion, each mouthful accentuated by a slight prickly heat from the mustard. I'm definitely adding this to my regular vegetarian repertoire. Speaking of which, I'm hoping to post more recipes for easy to cook greens, hence the title of this post. The recipe below makes enough for 2 as a small side, but scales up quite easily. 


Saturday, January 13, 2018

Places to Eat in the Riviera Maya


Tulum Beach, Riviera Maya


I haven’t travelled as much I would have liked to recently because life happened. However, things are changing - and last year I did get to spend a week on holiday in the Riviera Maya, Mexico. The Riviera Maya is a long stretch of Caribbean coastline on the eastern side of Mexico's Yucatan Peninsula, known for its beaches, blue seas and archaeological sites. In short, I’ve always wanted to visit. To see Mayan ruins, yes, but also - and unsurprisingly for me - because of the food I would get to eat! However, while planning my trip I struggled to find (English language) blogs with recommendations for places to try. Hence now that I’m back, I’m putting together this post listing places to eat by area. 

I have no expertise whatsoever on Mexican food, so these are just my favourites from the establishments I managed to visit. One of my cooking teachers sent me a great cartoon infographic illustrating the different terms used to describe Mexican dishes. Do check it out as a starting point if you're not exactly sure what a fajita is (I wasn't before I went!!). Be aware that everything below is "post-Hispanic" cuisine, and I didn't make it to restaurants like Axiote which serve grasshoppers and ant eggs. Also don't worry if insects don't appeal to you, as there'll be plenty of meat, cheese and tortillas abound instead. The list is also by no means exhaustive, but hopefully I'll remedy that by traveling back over the years and adding more to it! On this trip I was mostly in Playa Del Carmen, with a couple of days in Cancun and a day in Tulum, and my picks are based on these areas.  

The parts of Mexico I managed to see, downtown Cancun in particular, really reminded me of Bangladesh. The local buses with their loosely defined stops, the rain-worn buildings that could use a lick of paint and the chillies in my food - all this felt a little like home. Of course, a lot of this in my imagination, and Mexico is far more economically developed. The local buses may look rickety, but many of the drivers speak English. Gleaming new buildings are the norm if you head to the hotel zone, and not everything is still under construction like it seems to be in Dhaka these days. For now, I live in hope that one day Dhaka will catch up! 


Tuesday, January 2, 2018

New Year's Eve Snacking

ডালের বড়া 
Daaler Bora or Lentil Fritters

My batch of NYE daal bora, all plated up for us to devour

Happy New Year everyone! To kick-off 2018, I'm posting a very traditional recipe for daaler bora, or lentil fritters. 

The daaler bora is very different from the other fritters I've written about for the blog. First of all, it has no flour - gram or otherwise - and the daal or lentil is what goes straight into the hot oil. Secondly, making a batch of them is a bit of a challenge: the lentils need planned pre-soaking, followed by blending and careful frying to avoid disintegration. Oddly enough, in generations past they were considered an easy enough snack to whip up. I assume this is because households would have lentils soaking anyway as part of their daily routine, and making daaler bora would just involve swiping some from that stash. Things have changed nowadays though, and in our family the daaler bora is usually bought from neighbourhood eateries - at least when we're in Bangladesh. It's much less frequently made at home, and usually only for special occasions like Ramadan, when it's an iftaar staple. In general, the daaler bora is a tea-time snack, though it can also be eaten as a side during a larger meal. The fritters are also the first phase of another dish called the doi bora, though I'm not a big fan.

The ingredients used vary from family to family, and change between Bangladesh and the rest of South Asia, as well as between Hindu and Muslim families. My family recipe is quite basic, using only one type of lentil, salt, chilli, turmeric and onion. Other families may use a mix of different lentils, and also add spices and herbs to liven things up. In the recipe below I've added coriander, but otherwise I've kept things pretty simple. I've also snuck in a bit of baking powder, something one of our chefs taught me to do, as it makes the boras stay crunchier for longer. This is really useful if you want to make them a little ahead, as I was doing to take to a New Year's party an hour away. Boras like these are usually served with dips and sauces. I served my most recent batch with sriracha, but tamarind-based sauces or ketchup are the more common accompaniment. The recipe below makes about 24 boras, each about 3.00 centimetres across. 

Tuesday, December 26, 2017

Making Jhol

Curried Coconut Broth


Curried coconut broth 


I'm saving up to go travelling in 2018, so I didn't fly back to Bangladesh in December this year. Instead I'm spending the holidays with a few friends, and we all pitched in to cook different things for Christmas day. I made the roast, stuffing and gravy - but I did things a little differently from usual with the gravy. I'm a big fan of the traditional version made from pan juices, but I normally underestimate how much we want and make too little. To make sure we didn't run into the same problem again, I just made a broth from scratch. This is partially inspired by the super common curry sauce served over chips in UK fish and chip shops, but made a little richer with the addition of coconut milk. It worked really well with the spiced roast we made, but be warned the below portions makes quite a lot! 


Monday, November 13, 2017

Review: Royal Thai Restaurant London

Amazing Thai food tucked away near King's Cross


King prawn pad kee mao - noodle heaven! 

I've never lived in London long enough to discover its hidden secrets, those amazing little places tucked away in the nooks and crannies of the big city. Instead, I've done the next best thing, which is to rely on my more local friends for their insider information. And that's how I found Royal Thai. A friend suggested we drop by one night, promising that I'd be impressed by the food despite my teenage years in Thailand. And indeed I was, so much so that I insisted that we come here for dinner again the next time we met. The venue has now become a regular fixture for me - I've made several visits with friends and family, and its the first recommendation I make for Thai food in the British capital.  

Wednesday, October 11, 2017

Review: Darjeeling Express

Home Comforts in Soho


Methi Chicken, polao and a side salad


I’m glad central London finally has an Indian restaurant like Darjeeling Express. I’ve been eating at various Bengali (read: Bangladeshi) restaurants in the British capital for a while, and most of what I’d recommend is in East London. While many of these places do great food, like Amar Gaon or Dhaka Biryani, they’re small and geared towards casual meals. But Darjeeling Express is a fully-fledged restaurant, and somewhere I could go if I needed a smarter dinner venue. Even better is the fact that I wouldn’t be making any compromises on the food - the kitchen here produces amazing Bengali (and other Indian) dishes, despite its trendy Carnaby Street location. 


Saturday, September 9, 2017

Sweets From Meherpur

গুড়ের সন্দেশ
Goorer Shondesh


Goorer shondesh - baked and slightly caramelised on top


Shondesh has been such a staple in my life. During my childhood in Dhaka, Nani would provide a steady supply from her favourite sweet shop in Meherpur, couriered over on a semi-regular basis. If it wasn't her, it would be my dad or uncle bringing some back from their trips to the countryside. Unfailingly, each would point out that shondesh made in their hometown was the best. Shondesh keeps well in the fridge, so even after a week we'd be digging some out to have with tea. As a voracious and indiscriminate eater, shondesh was just another sweet I stuffed myself with, but I do remember it being a favourite of my brother's - the picky eater in the family. 

Shondesh comes in a few different forms, but basically it's yet another curd-based Bangladeshi dessert. If you're unfamiliar, imagine something a little like halwa, but softer and creamier. Making it involves sweetening and cooking curd on the hub, an easier process than cooking roshogolla or golap jaam. There are slight variations: you can sweeten the curd using sugar or goor, and you can opt to use spices or not. I prefer a version very lightly spiced with cardamom and sweetened with goor. The bones of this recipe comes from a friend's mom, who recommended that I just mix all the ingredients together before popping them into the oven. She served me a version of this one Eid, and I loved it, so I've now adopted her recipe. 

The egg listed in the ingredients below is very non-traditional - the result of her experimentation with texture and consistency. I've kept it in because I quite like the resulting squidginess. Baking gives the top of the shondesh a slight caramelisation, in case you're into that kind of thing (I am). Make this in the right dish and you can serve it as is, rather than chopping it up into smaller pieces (which is traditional). Shondesh can be eaten as a dessert after a larger meal, but more usually in my family it was reserved for tea time snacking. 

Tuesday, August 29, 2017

An Aloo Bhorta Substitute

Cumin & Chive Mashed Potato Bake


Fresh out of the oven, sans cheddar this time though


I've never been able to roast potatoes properly, hence this dish. I needed to serve potatoes in some way alongside roast meats and fish, and so I gravitated towards a potato bake. I know there are many luxurious versions with milk, butter etc. around, but I've avoided these in favour of something that isn't too unhealthy. Chives and potato are a classic combo, and I've incorporated cumin here as it's a favourite flavour of mine. The beaten egg gives the dish a bit of lightness. Truth be told, this is also my substitute to the traditional Bangladeshi aloo bhorta - especially as I can't get the right kind of dried chilli or mustard oil where I live right now. The amount below serves 4 as part of a main meal.


Ingredients:

  • 300.00 g potatoes
  • 1.00 teaspoon of powdered cumin
  • 1.00 tablespoon of dried chives
  • 1.00 tomato
  • 1.00 egg
  • Salt, to taste
  • Freshly ground black pepper, to taste
  • Cheddar to crumble, as desired

Method:
  • Bring a saucepan full of water to boil. Cut the potatoes into cubes, and add to the saucepan along with a little salt. Cook until soft, around 20 minutes
  • Preheat the oven to 180 degrees Celsius
  • While the potatoes are boiling, halve the tomato and slice into thin slivers
  • Beat the egg
  • Once the potatoes have boiled, run them under cold water so that they cool enough to add the egg without cooking it
  • Mash the potatoes, adding the tomato, cumin and chives
  • Season as desired with salt and pepper, then mix in the egg
  • Transfer the potato to an ovenproof dish, then top generously with crumbled cheddar
  • Bake for 25 to 30 minutes and take out of the oven

Sunday, August 6, 2017

Bangla-Chinese Experimentation

Chicken & Naga Pickle Stir-Fry


Steamed rice with chicken & naga pickle stir-fry


I've relied on stir-fries for relatively healthy meals ever since university, though I've graduated from readymade sauces by now. This is a very simple stir-fry that I sometimes cook on weekdays, albeit with a slight twist - naga pickle. Usually, I stir-fry my chicken with a little garlic before adding soya and oyster sauce, followed by various veggies. I'm a big fan of naga pickle, and so one day I made the decision to marinade chicken in this before cooking. I knew I'd like it...so I'm not sure I should be calling it experimentation! However, the flavour (and the kick!) here is quite strong, so it won't be for everyone. The recipe below serves two generously.


Ingredients:

  • 400.00 g boneless chicken breast or thigh
  • 1.00 teaspoon of garlic, crushed
  • 1.00 teaspoon of ginger, shredded
  • 2.00 tablespoons cornflour
  • 1.00 tablespoon sesame oil
  • 1.00 tablespoon naga pickle and oil
  • 1.00 carrot
  • 80.00 g of asparagus tips
  • 80.00 g of sprouting broccoli (or just broccoli)
  • 7 or 8 mushrooms
  • 1.50 tablespoon soya sauce
  • 1.50 tablespoon oyster sauce
  • Spring onion, to taste
  • Sesame seeds, to taste


Method:

  • Cut the chicken into cubes. Mix with the sesame oil, naga pickle, cornflour, garlic, ginger and leave to marinate while preparing the vegetables
  • Slice the mushrooms into slivers, shave the carrot into thin strips using a peeler and cut the broccoli into bite size pieces. Leave the asparagus alone apart from cutting off any stringy, older parts
  • Heat a frying pan on the stove, then add the chicken. On medium heat, fry for 8 minutes, adding a little water if the cornflour starts to stick (this will be unnecessary if your chicken is sold with a high water content)
  • While the chicken is cooking, toast the sesame seeds in a small pan without oil, until they begin to brown. Take off the heat and set aside
  • Turning back to the chicken, add the soya and oyster sauces along with a little water, then cover and cook for 2 minutes on medium low heat
  • Lift the cover, and deglaze with a little water if necessary 
  • Add the vegetables, then cover and cook for a further 4 minutes
  • While the vegetables are cooking, slice the spring onion into little pieces
  • Take the dish off the heat, and serve sprinkled with the toasted sesame seeds and spring onion

Additional Info
Feel free with switch up the sauces (try mirin or fish sauce) and of course, the vegetables. I've only cooked them for 4 minutes because I like them quite crunchy, but leave them on the stove longer if you want. Naga pickle is available to buy at most South Asian stores in the UK. It's sold in small jars, and can be mixed into dips or served as a side during meals.